Now that I’ve joined the Shenandoah Valley Art Center I’ve started watching their class schedule and saw an upcoming one by Peg Sheridan. Her classes fill up quickly so I jumped on it. Peg lives in Staunton and teaches all around the area. She’s been a watercolorist for forty years! Her teaching style and demonstration skills were great. That said, she made it look so easy it was frustrating.
I showed up prepared to be taken out of my comfort zone. I think to some extent that happened.
Peg’s initial demonstration was very loose. She reiterated something I’ve been told by multiple other teachers, that you can start light and loose and then slowly construct your painting in layers on top of that.
Through out the class Peg was a treasure trove of tips and tricks. I took as many notes as I could. For those who do not paint (or aspire to), this might be more detail than you want. Some of the more valuable ones were:
- When you start a painting, think about the outcome you’re trying to achieve. What kind of feelings are you trying to evoke?
- She had a lot of advice on mixing paint that go beyond simply mixing paint on your palette. First, she demonstrated mixing paint on the paper using gravity – put on your washes and then tilt the paper and let things run together. Second, she said it you do mix on the palette, don’t mix completely – just swirl the colors together but make sure you pick up some of each as well as the mix when you put brush to paper. This cuts down on muddy, over mixed colors.
- Use the side of your brush more – don’t always hold it like a pencil. Again, this is something I do with oils, but less so with watercolor. I need to fix that.
- Stand more while you’re painting to stay loser. You use your arm more instead of your fingers. I usually stand when working in oil, but sit while working in watercolor. I am going to start to stand more, at least at the beginning of the painting when I want to be looser.
- If you wet the paper wait till it starts to lose its shine before painting (I knew this but it’s always a test of my patience). Then as it dries, use thicker paint. Stop before it gets too dry because you’ll start getting back-runs.
- If you over-paint to make your whites pop, use acrylic instead of gouache to get brighter whites.
- For blotting clouds in the sky, wet the paper towel or tissue. It will pick up more paint.
- Also for skies, leave the whites of clouds dry but wet the shadows and tap in color.
There were some others, but these were some that resonated with me.
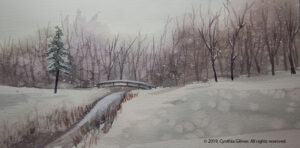
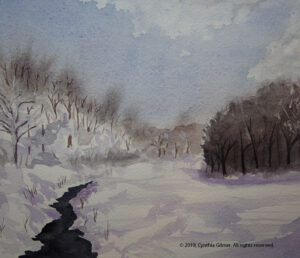
I did two studies in the class (shown below). Both are small. Peg’s advice was to strive to do several smaller paintings in the class rather than one big one to learn more. The first was a view of a bridge on the golf course near our house. I took the reference photo during the big snowstorm we got in December. The second was of a stream on the same golf course. This reference photo was taken several years ago on a sunny day after a big storm. Peg said she liked the first one but not the second. She thought the stream was too dark, and suggested I balance it with darker trees on the right, which I did. It still wasn’t her favorite, but I liked it well enough as a study piece.


