When one door closes…

When one door closes another door opens; but we so often look so long and so regretfully upon the closed door, that we do not see the ones which open for us.” – Alexander Graham Bell

This was a quote I used a lot during my days teaching innovation. We are often blind to opportunity because we look backwards and not forwards.

In the last week I received unpleasant news on two unrelated fronts of my artistic journey.

First, I was notified by Rockfish River Gallery and Gifts, where I’ve had my work for about four years now, that they are changing the terms of their standard agreement.

The woman who was running it when I first put some of my paintings there was a wonderful lady who was passionate about supporting local artists, but she was not a business woman. Last year she decided that she was unable to run the gallery anymore, so she sent a notice that she was going to shut it down unless she could find a buyer for it. The Rockfish Valley Community Center, where the gallery is located decided to take it over. They had a grand reopening over the summer and they appear to have breathed some new life into it. Unfortunately, they have also discovered that it is not sustainable under its current structure.

The new terms require a $20 monthly fee to be paid just to display there, and then they will still take a 30% commission on the works sold. If you want to volunteer to work 10 hours a month in the gallery then they will waive the fee and reduce the commission to 10%. In the four years that I have had work there they have sold exactly three paintings. I cannot justify paying $20 a month to keep my work there, nor will I work for $2 an hour, so I will be pulling my work out of the gallery. I will begin the search for additional galleries to display my work in that have more attractive terms. It is sad though, because that is the closest gallery to us and I can easily send people there, plus many locals tell me they’ve seen my work there.

I will continue to show some work at the Shenandoah Art Center in Waynesboro, and I also have work on display at the Friendly City Inn in Harrisonburg.

The other bad news, and this one is quite heartbreaking for me, is that Nimrod Hall will not be opening their doors for art workshops in the foreseeable future. Owners Laura Loe and her husband Will Loving need a break. Owning and operating Nimrod Hall is a labor of love, but Laura has been doing it for 25 years, first as a hired manager and then, since 2013, as an owner. They have decided that for now, they just want to enjoy it as a second home and a private retreat for themselves and their family. They have said this is for 2023 but have not speculated at all about what the future holds. For those who might be interested, here is Laura’s statement.

If you’ve been reading my blog for a while you know that I love Nimrod Hall. It’s a magical place where artists can go and simply create. It’s rustic, but that actually helps encourage me. I will miss it terribly, and hope that someday it returns to its former magical self. Until then I will need to look for other opportunities to immerse myself in art from time to time. Sometimes I simply lack discipline or inspiration to practice my craft. Nimrod always helped get me going again, but for now I will need to look for other ways to do that.

So as you see, I’m going to be out trying to open some new doors to see what I find. Stay tuned! Sorry, but this is a post with no art. I promise I won’t do that again for a while.

Nimrod 2022!

After a two-year break, Nimrod Hall Summer Arts was back up and running again this year as a fully functioning art retreat. In 2020 the season was canceled because of covid, and in 2021 they attempted to do an abbreviated version, but the year off left some of the buildings in a state of disrepair so they were unable to open. I signed up each of the lost years and was devastated each time I received the cancellation notice.

This year things were pretty much back to normal. Some of the buildings had gotten a facelift. The food was fabulous, as always. The group of artists who were there with me were wonderful. I really needed to get out of my funk and start painting again. Nimrod always helps with attitude.

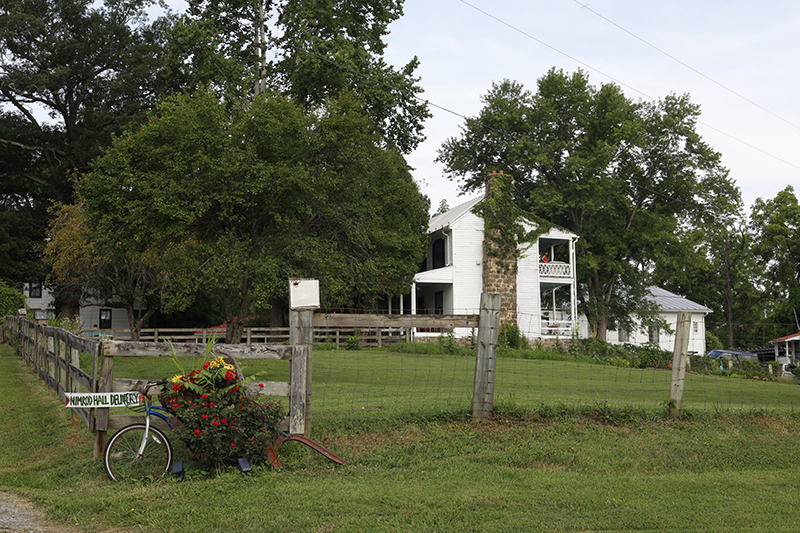
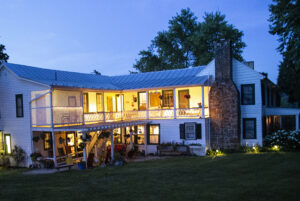
The main building at Nimrod, built in 1783.

As I mentioned in my last post, which I’m sorry was so long ago, my previous Nimrod teacher, Kesra Hoffman taught in June this year. I was cruising at that time so I was unable to work with her again. I chose watercolorist Kathy Calhoun’s class instead. This was Kathy’s first year doing a full week, but she’s done many weekend workshops. She is a full-time art teacher in a private school. She seemed to want to provide more instruction than I prefer, but I did spend some time with her and I learned some things. The class had a diverse level of experience, which added to her challenge, but she did well.

We arrived on Sunday afternoon, settled in, and met each other. I rented a studio again, as I did on my last visit. This helps give me a place to set up where I’m not always carrying everything around. I brought watercolor, gouache, and acrylic with me. I wanted to be ready for anything.

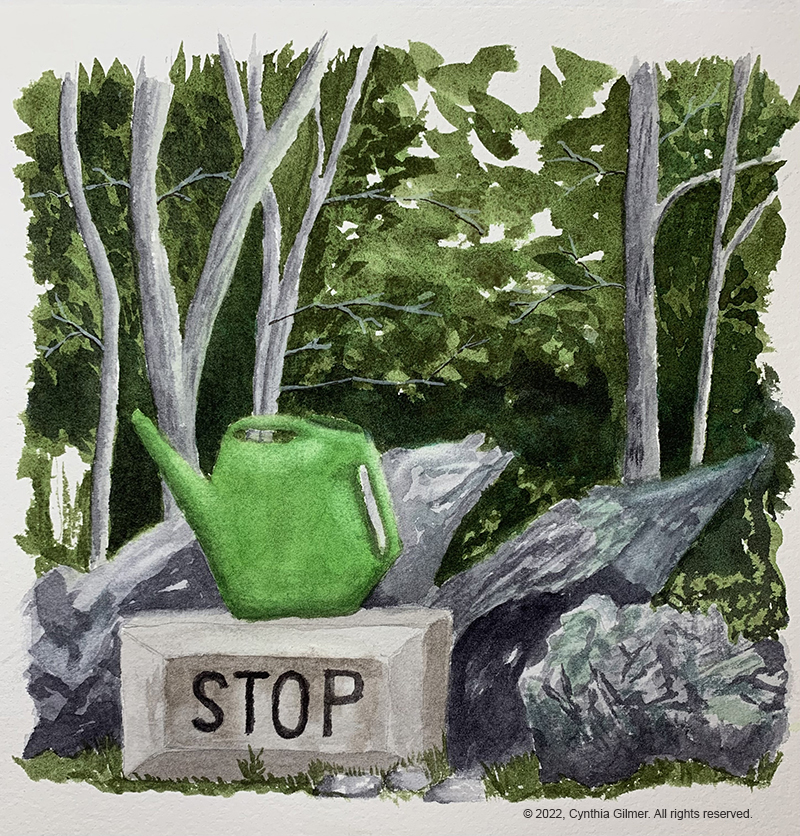
On Monday morning, I worked on finishing a painting I’d started in my sketch book some months ago. I needed to shake off the cobwebs. I’d done the foliage, but nothing else. The reference photo was a scene from my neighbor’s yard with a watering can perched up on a concrete block that says “stop”. It’s a fun little scene that I’d been thinking about painting for a while. I was happy with the result and felt a little bit more comfortable painting after the exercise.

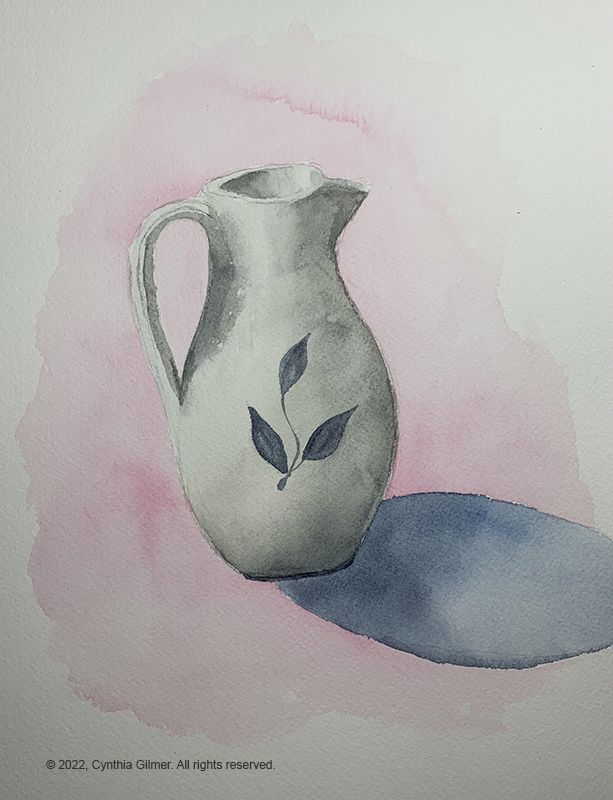
That afternoon, Kathy decided that we were going to work on still-life paintings as an exercise. I don’t do much still-life painting, so it was good practice for me. I chose a clay pitcher as my subject. We focused on shadows and highlights, and the cast shadow of the object. I should have included a surface edge showing the table in my background. Without it, my pitcher looks like it’s suspended in midair. I guess we know why I’m not a still-life painter.

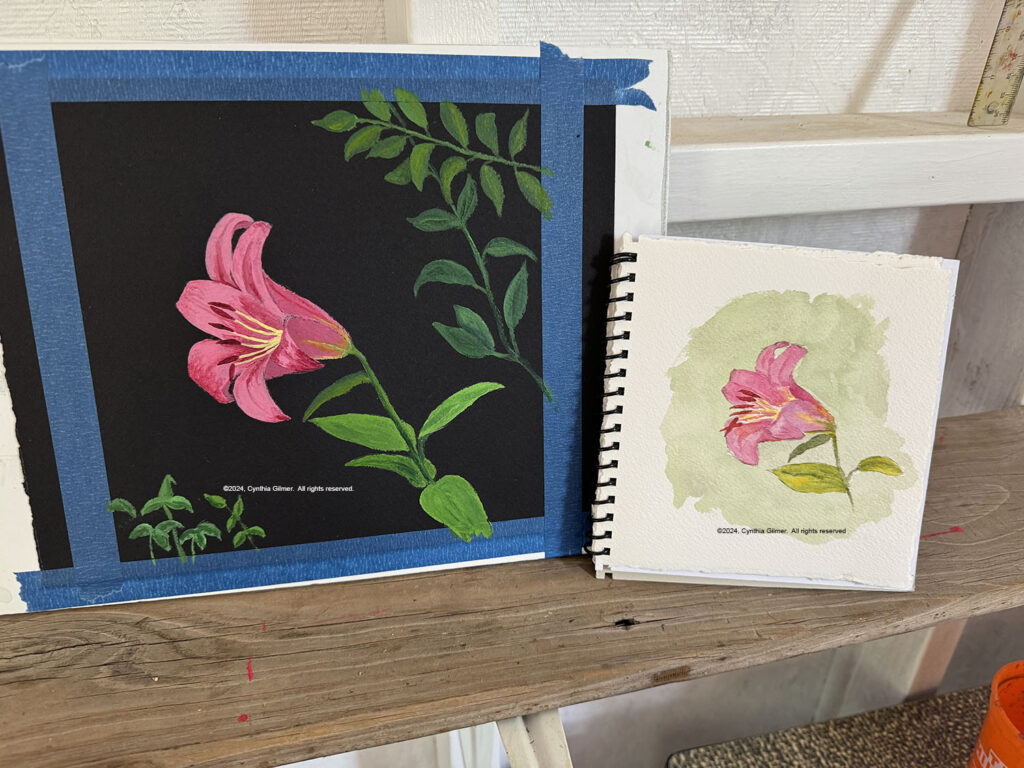
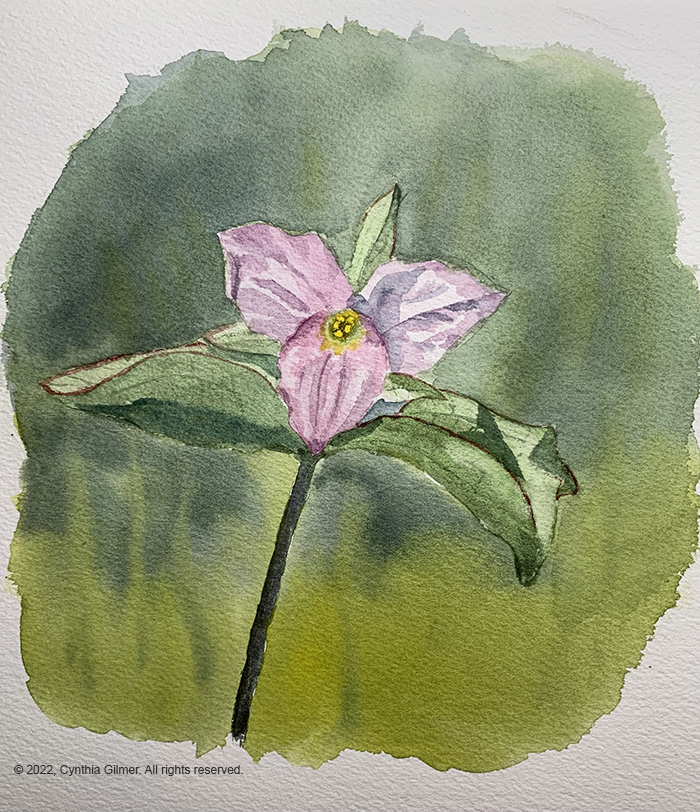
After the still-life exercise I went back to my studio and decided I still needed to get some of the rust off so I painted a flower. I don’t do florals often either. I chose a photo of a trillium that my husband, Bill, had taken. I like trillium, because it means that spring is about to make it up to our mountain top. It’s such a delicate flower. It’s a cute painting, but not great. It was still fun.

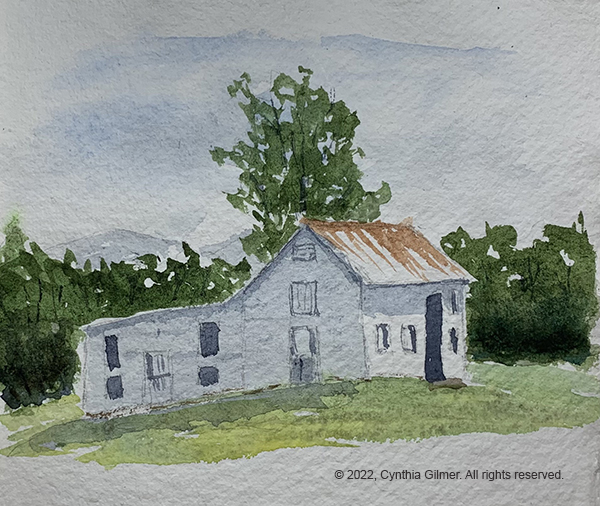
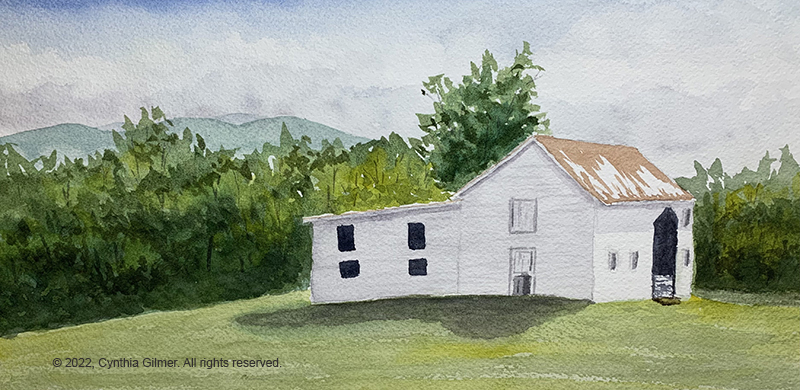
On Tuesday morning, Kathy decided we were going to do a plein air of the barn. I don’t really like to do plein air. I guess my tidy brain likes more perfection than you can achieve in the field, but I need to get better at it so I was happy to have the opportunity. Kathy emphasized doing a sketch first that helped nail down the color, composition and value. I normally wouldn’t do this, but wanted to follow directions, so I did a sketch in a little handmade sketchbook I had. I followed this by a full painting on a watercolor block. It’s funny but I, and most others who have seen them, liked the sketch better. It was looser and more fun. Perhaps this should be a lesson to me. Here it the sketch followed by the painting.

I was inspired by this exercise to sign up as a participant in the Rockfish Valley Foundation’s Plein Air Paint Out in October. More info on that later.

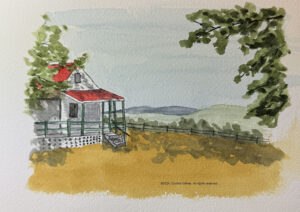
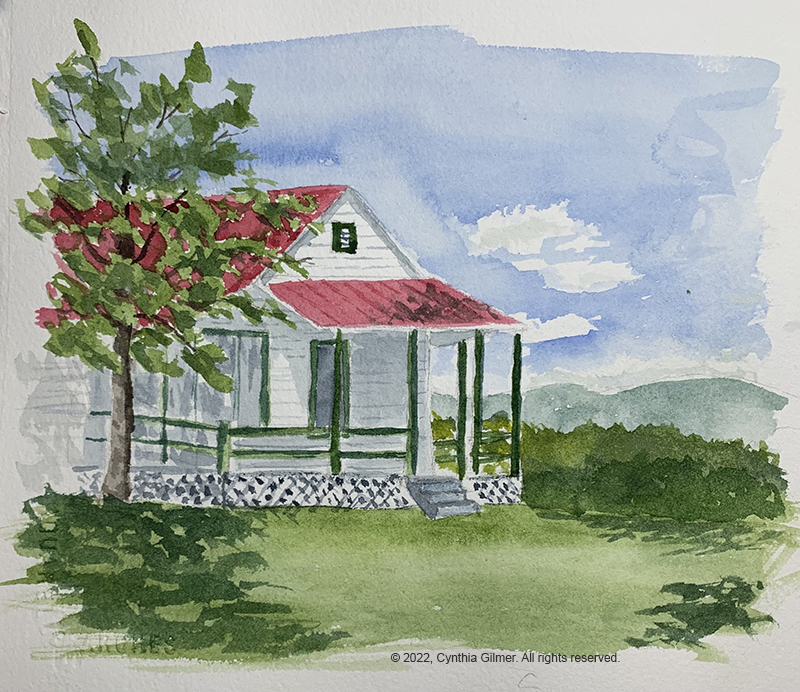
On Wednesday I opted out of Kathy’s sessions and decided to paint alone. It was a lovely sunny morning so I started with another plein air of one of the Nimrod cottages, Sunset 3. All of the cottages have challenging perspective. I tried to maintain what I learned about being loose from Tuesday’s session. I’m not crazy about this one, but it’s good plein air practice.

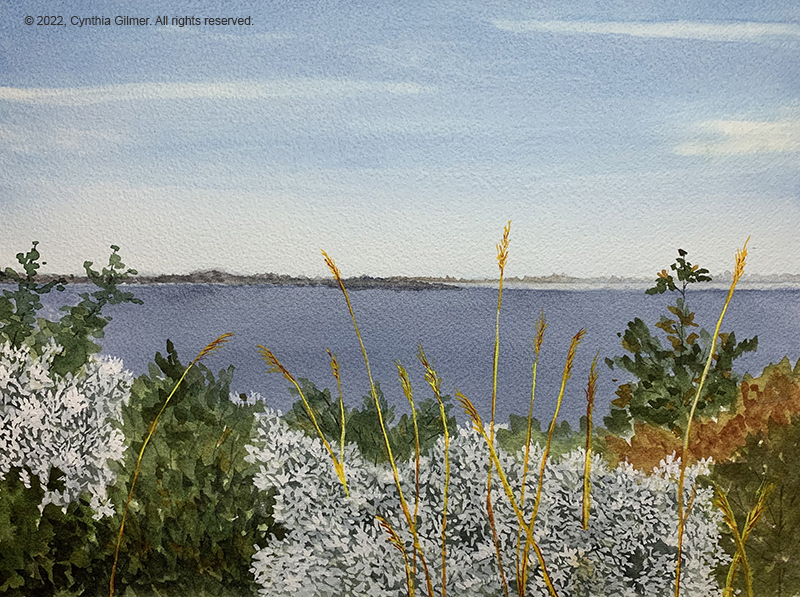
In the afternoon I decided to start on an experiment that I’ve wanted to try for a while. I wanted to do a mixed media using watercolor and gouache (opaque watercolor). I had a photo I’d taken at Westmoreland State Park on the Northern Neck. It was looking out over the water, and there were wildflowers in the foreground. I knew the watercolor washes would be best for the sky, water and foliage, but there was no way to capture the flowers and grasses well using watercolor. I started with the sky and water. I had a little trouble with it bleeding along the horizon, but I was able to recover it. Then I did the foliage. I variegated the foliage that would be behind the flowers so that you would still see some of the light and deep greens. Then I switched to gouache and painted the flowers and the grasses. I really liked the result. Other artists responded positively too. I am going to start using this technique more.

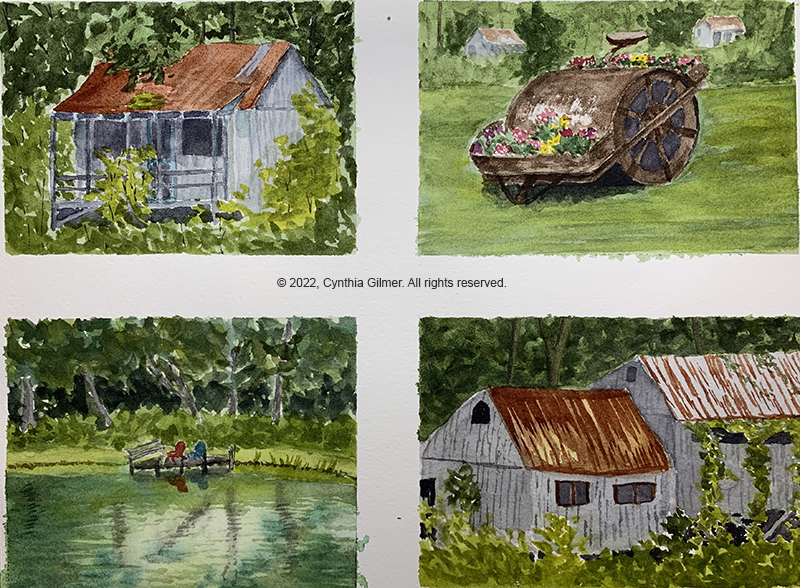
I finished the above painting on Thursday morning. Late morning Kathy came by and said she’s challenged her students to do three paintings with a theme in the afternoon. I had gone down by the pond and boys camp on my morning walk and had several pictures so I divided a piece of paper into four smaller sections and worked on four paintings from those photos. I paint fast, so the time frame worked for me. I rotated between the four paintings, letting each dry in between layers. I do admit that I got fatigued and it shows in the level of detail, particularly in the bottom two which I finished last. I put off finishing the one of the pond because I didn’t like the initial reflections, but I was eventually able to recover them somewhat. The perspective on the two boys camp cabins on the bottom is wrong. I was below them but the painting shows them from above. My favorite of the four was the roller with the flowers. That one was really fun to paint.

Thursday evening was the walkthrough, when everyone walks around and sees the work everyone did all week. This always ends in Nimrod owner Laura Loe’s studio where she shows us all of her recent works and paintings in progress. She has a unique style, so it’s always a treat to see her work.

It was a wonderful week and just what my artist’s soul needed. I am pleased that I made a commitment to the plein air event because hopefully that will keep me painting.

I know this was a long post. If you read to here, thank you! I am hoping to be painting and posting more regularly going forward. I have some things in my studio that I haven’t shared yet, so I’ll try to start with those.

My Sketchbooks

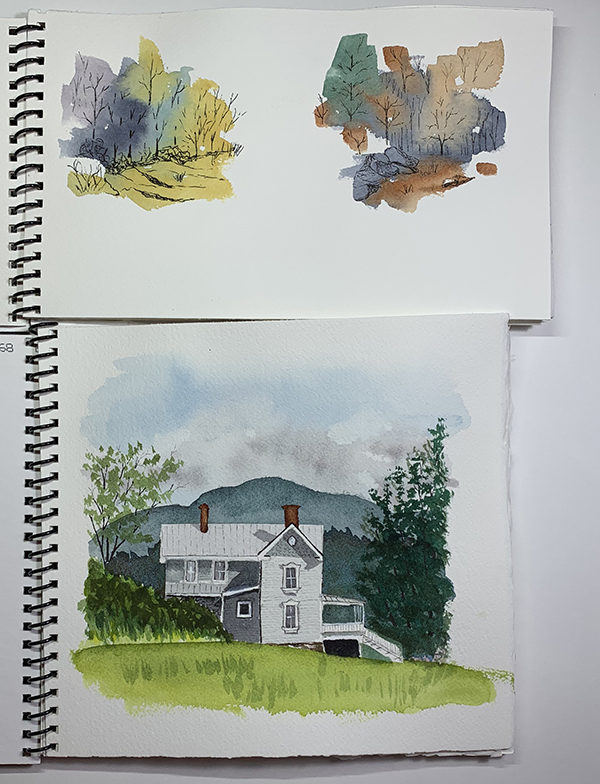
In my last post I mentioned that I was working on something in my sketchbook that I was going to share. One challenge with using sketchbooks is if you do something you really like it’s in a sketchbook and you can’t do anything else with it, because it’s attached to the sketchbook. Also, while you can get watercolor sketchbooks with good 100% cotton paper it’s still different from the paper I’m used to painting on. The way watercolor interacts with the paper, and the way the paper absorbs the watercolor is extremely important to the outcome, so I have become very picky about the paper I use. I always use Arches 140lb. cold press paper. You can’t buy a sketchbook with that paper, unless it’s hand crafted. I’ve gotten them off or Etsy but they are very expensive.

A few years ago, I took a class on Traveling with Watercolors at the Beverly Street Studio School in Staunton, VA. The teacher made her own sketchbooks with Arches paper. She would cut the covers from mat board scraps and she’d cut the paper to fit. Then she’d take the whole thing to Staples to have them punch and bind them. I did a little research and figured out that the binding machines don’t really cost that much, so after about a year of thinking about it I bought one and started making my own sketchbooks. I have done two so far. I just filled up the first and started painting in the second one.

Here they are closed so you can see the covers and how they are bound.

And here they are open so you can see some sketches on 100% cotton Arches 140lb. paper.

Anyway, one advantage to using sketchbooks that have nice paper is if you get really lucky and create a painting that might be suitable for framing, you can detach it and frame it.

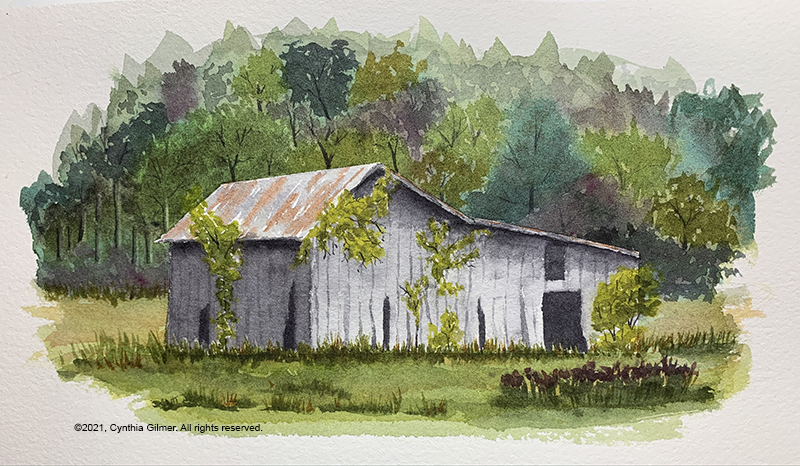
I had taken a photo of a small barn in the valley across from Devil’s Backbone Brewery. I didn’t really like the setting, but the barn itself had a lot of character. I thought I would practice Steve Mitchell’s spontaneous watercolor techniques to do the background and then I’d paint the barn from the photo. Masked the barn with tape and then painted the background. The spontaneous method requires a lot of random paint, water, blending, running, dripping and spraying. Then you use the random shapes and create more detailed aspects of a landscape from it. I really liked the outcome.

It is looser than most of my work but the barn is still quite detailed. It also has white space around it, rather than filling up the whole page. That’s actually a function of the sketchbook because I don’t feel compelled to paint to the edges. I don’t have to paint to the edges on other paper either, but I have this engineer’s brain that really wants to fill up the page. I’m going to use this as an inspiration to stop doing that.

It’s small, about 7 x 9 inches. I bought a small frame and I’m going to remove it from my sketchbook and frame it.

Gouache Experiment

I registered to spend a week at Nimrod Hall again this summer, but it was not to be. Laura Loe, the owner and operator of Nimrod, decided to cancel the whole 2020 season in light of the need for social distancing to stay safe. I was heartbroken, but it was the right thing to do. I will need to focus on the 2021 season instead.

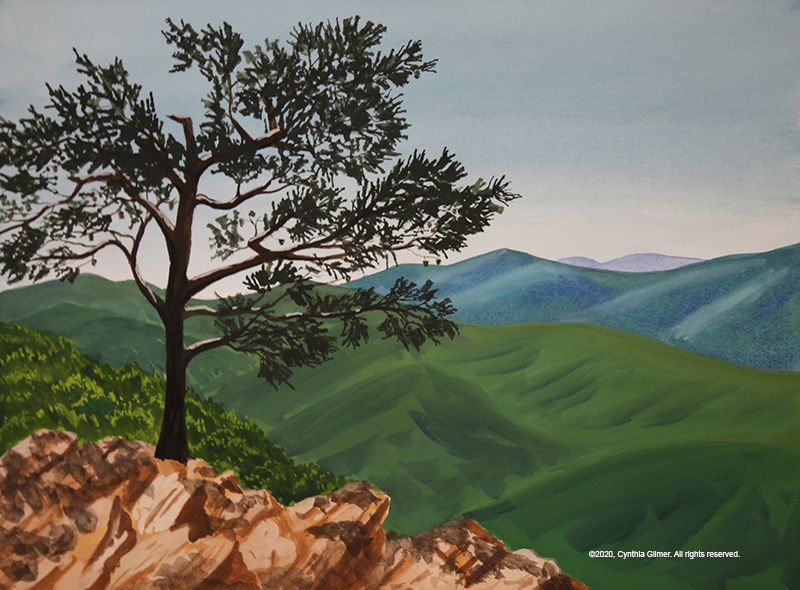
Nimrod is such a magical place where artists go to fuel our creativity. This year I had signed up with Kesra Hoffman again. I don’t usually sign up for the same instructor, but Kesra is very versatile (watercolor, acrylic, gouache), allowing me to run with whatever medium I am in the mood for. But since she really excels at gouache I thought I’d practice a bit. Here’s a painting done from a photo I took of the Raven’s Roost Overlook, on the Blue Ridge Parkway not to far from where we live.

It’s on Arches 140 lb hot pressed watercolor paper. For watercolor I usually work on cold pressed paper, which has a rough surface. I thought the smoother surface would be nice with gouache.

Gouache is opaque watercolor, so in many ways it behaves the same, but it is also very different. One thing that really struck me for this painting is the difference in how the colors work. Watercolor dries lighter than what it appears when you apply it. Gouache dries darker. As a result, the colors in this painting are bright and bold, and not particularly realistic. I ended up not minding that too much. I particularly like the highlights and the shadows in the mountains. I can’t get that effect in watercolor. I think that is partly because watercolor is transparent and blends more than gouache, and partly because of the smoother surface of the paper. I will need to experiment more.

I hope everyone is home and safe and free from COVID-19. Please take care and be well!

Nimrod Hall 2019 – Part 2: The Art

I apologize for this really long post. I wanted to capture the whole week-long journey all at once. I love Nimrod Hall!

Day 1-sketching and getting my Rhythm

We arrive on Sunday afternoon. Actual painting days are Monday through Thursday. On Friday, check out time is about 11 AM. So that’s four full days of painting. A rare luxury of which I planned to take full advantage!

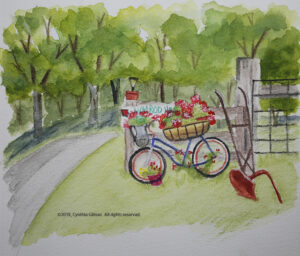
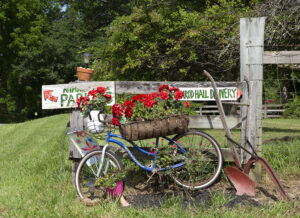
Monday morning I decided the best approach was to go out with my sketchbook. This would give me a chance to loosen up and get comfortable. Laura Loe is good at putting cute little paint-able things around. Last time I visited I noticed this bicycle at the front entrance to the property with geraniums and other flowers planted on it. I regretted not taking a photo of it since my last visit, so I decided it would be my first subject. I chose watercolor pencils as my medium, but did the foliage on the trees with regular water color. The challenge with this one is that it was our hottest day and I was sitting on my uncomfortable folding stool in the blazing hot sun. I could only tolerate that for so long. I did get a fun little sketch.

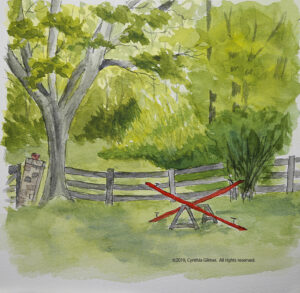
After that, I decided I needed to get 1) out of the sun, and 2) into a more comfortable chair, so I decided to paint the two red seesaws on the lawn between Square House and the Post Office. This allowed me to sit in an Adirondack chair under a tree. It was much more comfortable.

I chose line and wash as my medium. I did the sketch and inking (mostly) before lunch. After lunch the sun had moved so I was forced to move my chair. The charge in light and perspective did not matter too much since I’d already captured the drawing. I spent the afternoon finishing This up and felt it was a good second effort for the day.

Day 2- Landscape Painting in My studio

Monday evening our teacher, Kesra Hoffman did a gouache demo for our class. She said she resisted the medium at first but then decided that she could just use it like watercolor and grew to love it. I’m not sure I totally agree with that, but I do agree that if you start with a wash and build up, that first layer is similar to water color. Watching the demo was humbling because Kesra is so comfortable with the medium. I knew I needed to try it to see what kind of results I could get.

Another factor that helped set my direction for the day was my realization that I should get over needing to do plein air and paint in my studio. As I said in my earlier post I have always thought of Nimrod as a plein air location, but found that many of the artists there with me did not subscribe to that way of thinking. I figured I had paid for the studio so why not use it?

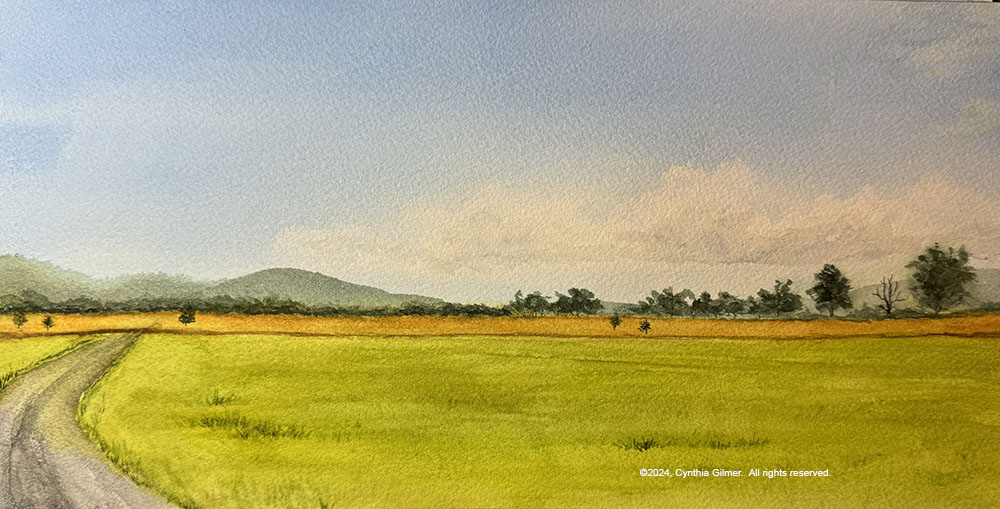
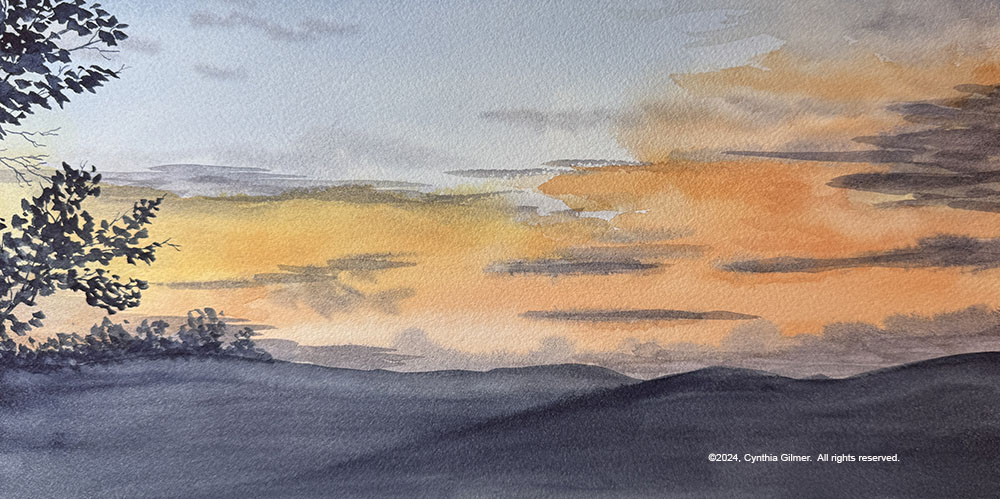
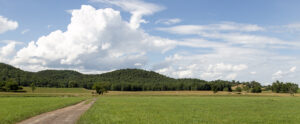
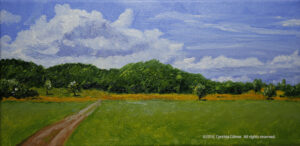
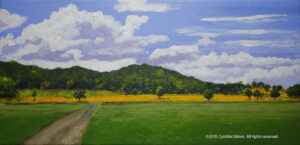
I went for a nice walk on Tuesday morning and took some nice pictures. I decided to spend my day painting a landscape from one of my photos in both watercolor and gouache to compare the two mediums. The reference photo I used is below. I like it because of the clouds and the contrast between the green grass and trees and the golden fields. I also noted the clump of trees right at the end of the road. Technically this is a composition no-no, but I kind of liked it so I decided to run with it.

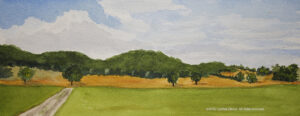
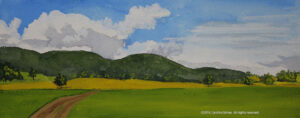
I painted the watercolor and the gouache together, switching from one to the other during drying time. There are similarities and differences between the two mediums. I learned that the gouache can get undesirable “blooms” just like watercolor. The gouache yields harder edges where soft edges are easy in watercolor.

When Kesra came by in the afternoon and did her critique she pointed out a couple of things. First, my road did not go far enough into the center of the painting. She showed me how I’d made an error in the proportions as they appeared in the photo. Second, she pointed out that the trees at the end of the road weren’t really working. I’d hoped they would, but I was wrong. She also pointed out that the variations in color along the tree line in the gouache were really nice, but the watercolor was too consistent.

I was able to cover and move the road in the gouache, but that was not possible with the watercolor—a distinct difference between the opaque and transparent mediums. I also lifted some color on the tree line in the watercolor, but in a subsequent critique Kesra pointed out that it was a little too formulaic. Here are the two paintings. They are 10” x 4” on Arches 140 lb. cold press paper.

Watercolor

Gouache

I really liked doing the same scene in two different mediums. It was very educational, not only in learning about the different media, but also in studying and interpreting the scene. I decided to keep it going the next day by doing the same scene in oil and acrylic.

Day 3 – More Landscape Painting in my Studio

When I was packing to go to Nimrod I packed way more than I needed for art supplies, because I didn’t know what I’d be doing and wanted to have whatever I needed. I am happy I did that, because I ended up doing some things that were out of the ordinary…like painting in acrylics. I had these two little 12 x 6 stretched canvases that I tossed in. I like the 2:1 footprint for landscapes, although I usually paint bigger. Painting smaller has its advantages if you’re painting plein air or trying to do a lot of quick studies.

So on Wednesday morning with my two little canvases in hand I set out to paint the same scene in oil and acrylic. I haven’t painted much in acrylic in years. I get very frustrated with it because once I switched to oils, I couldn’t take acrylic’s fast drying time.

Once again I switched back and forth between the two. Of course, that didn’t allow the oil to dry…that takes weeks or even months. Switching still gave me a break. It’s always good to look away.

Similar to the gouache, the acrylic yields much harder edges. The fast drying paint makes it hard to blend the colors, but the oils are very difficult to get hard edges with. You can do it if you wait for it to dry, but that takes a long time. 

I like the colors better in the oil version. There is more variation. Some of that is the nature of the slower drying oils, but I also had a more extensive palette of oils to start with. I only had a limited number of acrylics, even after supplementing them by buying more in “The Art Box” bus which is parked at Nimrod every summer to provide artists with materials they find they need but don’t have with them.

When looking at all four versions I found that I got bolder with the skies on the second day, so the oil and acrylic versions have much more dramatic clouds, which I think is an improvement. I found myself wishing I’d been more daring with the skies in the watercolor and gouache versions.  Here are the two paintings from Wednesday.

Oil


Acrylic

Day 4 – Another Day of Gouache and Watercolor, but Not the Same Subject

I had one last day to paint and after spending two full days interpreting the same scene I was ready for something different. I did two more paintings on Thursday – one watercolor and one gouache.

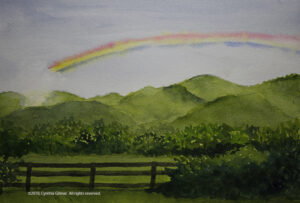
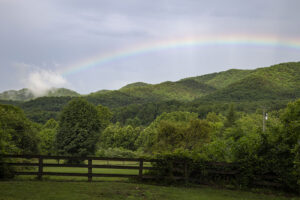
On Tuesday evening we had a thunderstorm followed by brightening skies and a rainbow over a nearby ridge. I brought out the camera and took a lot of pictures. While I was doing so I pronounced, rainbows are nearly impossible to paint. So what did I do? I painted the rainbow!

Several years ago I did an oil painting of a rainbow from a photo a friend had taken. I was not happy with the result. I decided that watercolor might be friendlier. I hoped that if I did a wet in wet approach I could get the primary colors to bleed into a full ROYGBV* spectrum. It kind of worked, but not nearly as well as I had hoped.

The criticism Kesra had for me was that I did not get enough atmospheric distance in my mountains. They were too green, which is never the case when you’re looking at them at a distance. This is something I’m still trying to train my engineer’s brain to do. I need to learn to see, and paint what I see, rather than painting what I know to be true. Yes, the mountains are green…and yes they look green to me in the picture, but they are much bluer than I think. I really need to work on this! Here is the painting. (10” x 7” Arches 140 lb cold press)

And here is the reference photo.

* red, orange, yellow, green, blue, violet

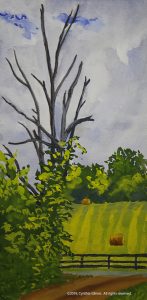
In the morning I’d gone for a walk and I found a pretty scene with a dead tree (dead trees are great fun to paint) and a field in the background with hay bales. I decided it would be fun to do as a gouache study for my final painting. This is probably the one I spent the least time on. We had the walk-through that evening and so there was a lot of pressure to get it done.

Kesra didn’t have a lot to say about this one. I like the sky but the rest of it is a little flat. I could probably correct that if I spent some time on shadows and highlights. I may also do this again in watercolor. Here is the painting. (6” x 12” Arches 140 lb. cold press)

Each Nimrod art week finishes on Thursday night with a walk through where everyone displays what they were working on and people walk through and see it. As Laura Loe explained, it’s not really a critique… it’s more of a “love-fest”. I must say, people did some lovely work.

I painted up until almost the last minute and then tidied up my studio, which of course was a mess. I did take a break to shower, but most everyone was well dressed and I was still in my shorts and t-shirt. Oh well.

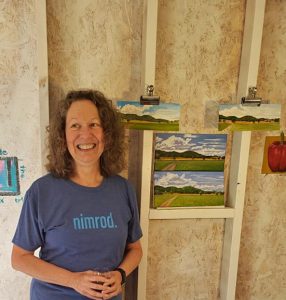
People seemed to like my story about my scene that I painted in different media. They were interested in which I liked best and I explained that all had their pluses and minuses, but the process was very educational. Here I am with my work.

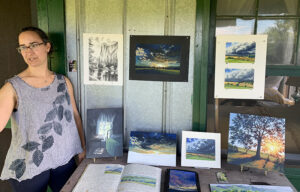
Is I said in an earlier post, Kesra did her own thing in the morning and did critiques of our work in the afternoon. She did some beautiful work. Her gouaches really pop. I’m hoping to keep practicing my gouache. I’m inspired by how beautiful hers are. Here she is with her body of work from the week and a few other things she threw in. The two landscapes on the upper right were the demo she did for us on Monday evening.

Nimrod is a magical place and it’s wonderful to spend time with such creative people in such an inspirational place.  I’m already looking forward to next year. 
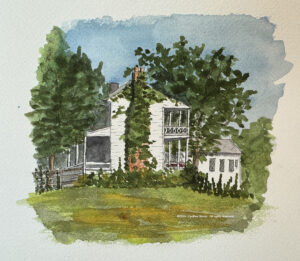
Nimrod Hall 2019 – Part 1: The Nimrod Experience

Please go to the main page and subscribe to my blog if you want to see all of my posts.

After a two-year break I finally returned to Nimrod Hall this year for their Summer Arts Program. This is the first time I’ve gone for a full week – my past three visits were all weekend workshops. I was excited to go again, but a little nervous about the “rustic-ness” of it for a full week. I did fine with my back corner room in Square House, despite the fact that my shared shower was too small to turn around in. Halfway through the week I even found an alternative to that. Fortunately our weather was not too hot, so the lack of air conditioning was not a problem.

The instructor I signed up for was Kesra Hoffman. I chose her because she does beautiful gouache paintings. Gouache is a medium I’ve not worked a lot in but would like to learn to use better. At Nimrod you can sign up for a particular instructor or you can sign up for an “open-week” where you just paint what you like. Total we had about 30 people for the week. Ten were signed up for Kesra and the other 20 were open week.

An example of Kesra’s art

Each instructor is different, but there seems to be a general assumption that Nimrod full-week attendees are experienced painters who don’t need or want a lot of instruction. Kesra’s style was to do demos in the evening and be hands off doing her own thing in the morning. Then in the afternoon she would come around and do one-on-one critiques of what we were working on. That worked pretty well for me.

One great thing about Nimrod Hall is that it comes with three meals a day, eliminating the need to cook, clean up, or look for restaurants. This means more time to focus on painting or just relaxing. Chef Jim spends most of his year cooking at a fraternity at Washington and Lee in Lexington VA but for the past several summers he has worked at Nimrod. His food is fabulous. It’s got a local southern flair, but is in no way plain. Everything is family style and I can assure you no one goes away hungry. I’m not a dessert eater, but every night after dinner we got something that was big and gooey and irresistible. I was trying to diet for an upcoming vacation, but gave up after a couple of days.

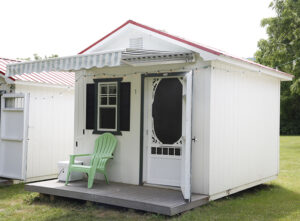
This year I also did something different… in 2014 Laura Loe, artist and Nimrod Hall owner, decided to establish “studio row” a grouping of 10 individual studios each in its own little approximately 10’ by 10’ house. Studios have a front porch covered with an awning allowing you to work inside or outside depending on your preference. They don’t have much of a view, so if you plan to paint there you will need to paint from reference photos, or other material. I rented one, primarily motivated the need for an easy and accessible place to store all of my art supplies for the week. If I ended up with an upstairs room (I didn’t) I was certain to struggle with carrying everything up and down those stairs every day. Sadly I’m not as young as I once was. I got studio #7 and ultimately ended up doing a lot of painting there. It was protection from the occasional rain showers, and provided a nice little space where I could concentrate on honing my craft.

Studio Row

My Studio

On a related theme, I’ve always considered Nimrod to be a place for plein air painting. The instructors in my weekend workshops have encouraged us to set up as a class outside and paint. As I said earlier, the weeklong workshops seem to encourage a more independent approach. Many of the artists brought partially finished works that they wanted to focus on and finish. Others painted from photos. Some just painted from their mind’s eye. So, after the first day I got over the idea that I simply had to paint plein air. Took morning/evening walks and took reference photos and then painted from those.

As is true with any experience focused on a common activity, I really enjoyed spending the week with likeminded people. As I said, there were about 30 people there. Most were women but there were a few men. Kesra got her class together on the first evening and we all talked about our background and goals for the week. It was a great group of people that included, Jennifer Eidson, an artist from Columbia MD. This was her first time at Nimrod. Dolly, who was 87 years old and suffered from macular degeneration but still paints(!) was across the hall from me. She traveled to Nimrod from her home in Charleston WV with her daughter-in-law, Laura, who was a novelist and decided to use the time to edit her most recent book about the daughter of a hoarder. Porter Smith-Thayer painted on the porch of Square House most days. She is an oil painter and this was her first time at Nimrod Hall. Matt, a photographer for the Roanoke Times and watercolor artist was there. He and Jane, another watercolorist, had done Kesra’s week for the last few years and knew each other well.

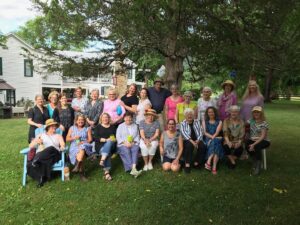
Here is a group picture that was taken of most of the week’s artists including both Kesra’s class and the open-week participants.

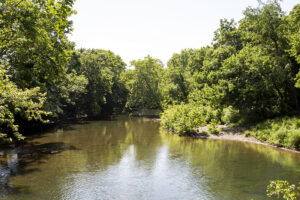
Finally, the Nimrod Hall and its surroundings are beautiful and inspiring. It’s located in rural Bath County Virginia, which is right on the West Virginia border. Bath County has no incorporated towns or cities – even its county seat is an unincorporated and very charming town called Warm Springs. It is probably most known for the town of Hot Springs, which is home to the Homestead Resort, I lovely and very upscale hotel. The clean and beautiful Cowpasture River runs through the county and the wildlife is abundant. On our second day we had a visit from a bear. He was a juvenile, old enough to have left his mother, and was curious but in no way aggressive. And I might add, he was cute as a button. Unfortunately I didn’t get a picture because when I reached for my iPhone if found an empty pocket because I’d left it on the table in my studio.
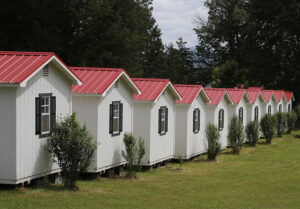
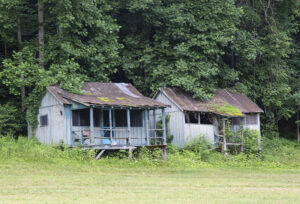
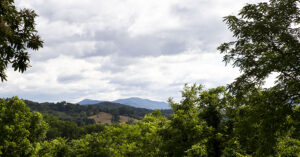
Here are some photos of Nimrod Hall and its surroundings.

Nimrod Hall Main House

Typical Painting Subject

The Cowpasture River

Old Boy’s Camp Cabins

Our Rainbow

The art I did will be the subject of my next post.  Hope to have that up in a few days.  Stay tuned…. (and subscribe!)


Following Along with Steve

If you enjoy this post please consider going to my home page and subscribing to my blog.

Since I started watercolor I’ve watched a lot of “instructional” videos to learn to do it better. Many of these are just demonstrations with no real instruction. Some provide a little commentary. Some are badly filmed and it’s really hard to see the details of the work. Then there’s Steve Mitchell’s Mind of Watercolor, which is hands down the best online watercolor instruction I’ve found.

I found Steve on YouTube a couple of years ago and I was immediately drawn to his spontaneous watercolors. I found his commentary very informative and his corny sense of humor endearing, so I subscribed to his channel and started watching him regularly. Eventually I decided that I was deriving real value from watching his videos and I didn’t think it was fair that I not give back something in return so I became a Patreon subscriber. I have learned so much from watching Steve’s videos that I still consider my monthly subscription fee an excellent investment.

The interesting thing is that I always watched his videos and then I’d take what I learned into the studio. This provides useful information but it’s often hard to translate into real transformative learning that will make my art better. This month I decided to watch in the studio with my sketchbook and palette near at hand, and to paint along. When he gets ahead of me, which he always does, I simply pause the video and catch up. I have to say, I’ve learned so much more doing it this way. I’ve done this with three of Steve’s videos so far. Here is what I feel I’ve accomplished.
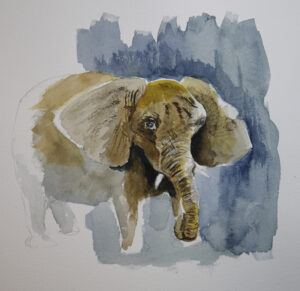
The first video that I painted along with was called “Mixing Luminous Browns + Elephant Demo Watercolor & Gouache”.

One of the goals of the video was to learn to mix browns that weren’t just mud. Unfortunately, I didn’t have a lot of the colors he was using, so I improvised with what I had. As a result, I don’t know that I learned much about mixing browns, but following along painting the elephant was extremely instructional. The biggest take-aways for me were the use of dark shadow contrasts to frame the lighter areas of the face. I also focused mainly on the head and very front of the animal and just faded out the back. Here is my elephant.

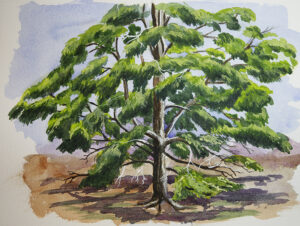
The second video was called “Tree in Afternoon Light Watercolor Painting – Ft. Meze Audio 99 Classics Headphones”.

This one was a little unusual because it didn’t include much commentary. Steve has a pretty good YouTube following which makes him of interest to potential sponsors. I don’t think he takes a lot of paid sponsorships, but he does occasionally take free stuff and pays back in kind by giving his endorsement on a video. This was such a case where he had gotten some free headphones and chose to put up a video of him painting with just the music he was listening to. This doesn’t break with his process because he generally just films himself painting and then adds the commentary later. He said that he planned to do a version with commentary.
Because this one was minimal commentary, I had to just follow along and watch him paint. Early in the video he showed his reference photo and I was able to capture a screen shot and print that out which was very helpful. What I learned from this video was a lot about seeing light. The process of capturing the afternoon light on the trunk and the variations of green in the pine needles in a series of layers was very enlightening. The result here is not my favorite. I felt that I was unable to effectively capture the feeling of pine fronds…mine are more just blobs of green, but its not terrible and it was a learning experience.

The last one was more of a tree study and was called “Tree Shadows Study & Playtime w/ArtGraf & Water-soluble Graphite”.

This one was a lot of fun. I’m a sucker for trying Steve’s product recommendations, although this video he was reviewing the ArtGraf Water-soluble Graphite, which he ultimately did not recommend. He’d expected something different and said that they really just compared with pan watercolors. Since I didn’t have the product I resorted to my regular watercolor palette when needed and did fine. He did rely heavily on water-soluble graphite pencils, which I had seen in an earlier video and I had purchased some so I was prepared. These are essentially graphite pencils that can be activated into washes with a wet brush just like watercolor pencils. I followed along as Steve did about three iterations of drawing, spending a lot of time capturing the lights and darks, and focusing on structure and depth to make the painting look 3-D and not flat. Finally, in the last iteration we added a hint of color.

One thing I felt came from my following along approach in all three videos was to gain some insights of seeing through Steve’s eyes. While I’ve accomplished a lot in mastering the mechanics of painting, I’m still trying to learn to see like an artist and to add my own expression to what I see. I think this last video was the best helping me with this. I’m not sure why…perhaps because it was a relatively simple study so I could focus on that aspect of it. Steve posted his reference photo on Patreon so I was able to look at that and see how he as capturing it, which was also very helpful in translating what he was seeing to what he was painting. Here is my version.

One thing I like about the results of this exercise is that I brought my own style to each painting. They are not as good as Steve’s, nor can I expect them to be, but each is uniquely mine.

Steve just posted a new video and it is a figure painting, which is going to present much more of a challenge. I’m not good at doing people, but it’s something I need to learn.

Class: Traveling with Watercolors

I’ve wanted to attend a class or a workshop at the Beverley Street Studio School (BSSS) in Staunton Virginia for a while, but every time I’ve tried to sign up, the things I’ve been interested in have been full. My timing was lucky more recently and I was able to sign up for a two day Traveling with Watercolors class (February 15-16) with Roanoke based artist Robin Poteet. The BSSS prides itself in providing high quality art instruction in a non-degree setting. I am thrilled that they are only about 45 minutes from me and look forward to attending more of their classes and workshops.

This class interested me because I do try to travel with my watercolors, but if find I rarely actually use them while traveling. This is for a variety of reasons, but I thought maybe a class could give me some pointers on how to get the most out of painting while on travel. I also read a book called The Urban Sketcher by Marc Taro Holmes a few years back and I was intrigued by the idea of doing ink and wash sketches on site and thought this would give me more insights into that. I really didn’t have any expectations for the class, but it was great fun and provided me 12 hours of uninterrupted paint time. It allowed me to explore a new approach and mindset for painting and also gave me time to reflect on a recent vacation that I chose as the subject for this class.

Robin is a wonderful watercolor artist. She does beautiful studio work that you can see on her website, but she’s also has been leading travel painting trips for many years and has an awesome collection of travel sketchbooks that she’s developed during her travels.

She makes her own sketchbooks, which allows her to make them from her paper of choice (Arches). Watercolor sketchbooks don’t usually have 100% cotton paper in them, and lesser quality paper can be very frustrating. She gave us each a 12-page sketchbook that she made, and explained how she cuts the pages, makes the mat board covers and has them bound at Staples.

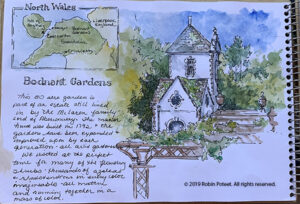
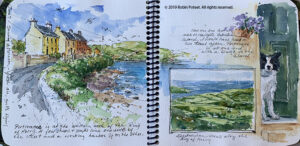
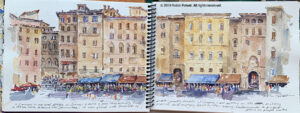
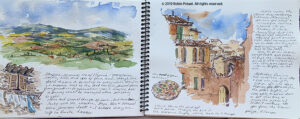
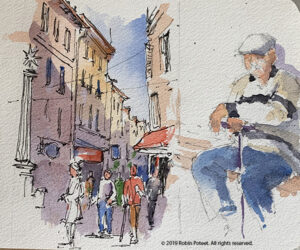
We started the class with her sharing all of her sketchbooks, I would estimate that she had close to 30 of them, and they provided great inspiration. She is a former designer and talked about the importance of the layout of each page, many of which had multiple sketches on a single page along with text. The page layout is my biggest challenge and will be something I need to work on. Below are several pictures of pages from her books.

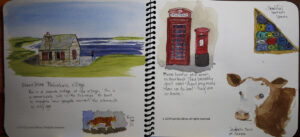
This first one is painting from a trip to Wales. In addition to her loose and beautiful painting she has included a painting of a map showing where this place is. (Click images to enlarge.)

This next one is a spread from a trip to Ireland. This is a great example of how good she is at layout and design. Note that the image on the left carries over to the right hand page, but she’s included an inset of the countryside and the great dog painting.

This next one is the main plaza in Siena Italy. I like the two-page spread and the way she’s captured the activity and the people on the street level. This is extremely hard to do.

This last one is of Umbria, where my sister lives. This is another good example of layout with the two main pictures, but I love the window with the laundry and the pizza on the lower parts of the page. You will see that both of these inspired some of my work in my own sketchbook.

Robin provided a lot of roving commentary and critique, which was extremely useful. She did one demo of painting people, which we all said we needed. She emulated a page in a sketchbook (below). I’m sure she would have done more demos, but we were all so wrapped up in our own books we didn’t really ask her to. In hindsight I wish I could have watched her paint more.

I used my trip to Scotland in June of last year as my subject. I completed the cover and 10 of my 12 pages during the class time. I finished the last two pages when I returned home. Some of what I did is good, some not so much. There were times when I ran out of steam and it shows. Still, not too bad for a first effort.

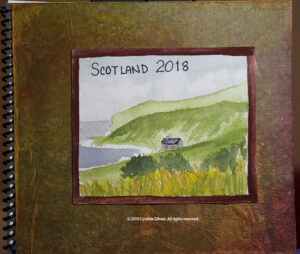
The cover was made from gray mat board, but Robin embellishes hers by gluing hand painted tissue paper to them and then gluing a painted image to that. This part of the class was sort of ‘crafty’ and not really my thing. I think I’d be fine with mat board covers and the image and a title glued to them. She uses scrap mat board, which isn’t always clean, and also pointed out that the covers suffer wear and tear during travels so there is a need to cover them to make them look nice.

Here is my cover. The image is a quick sketch of Scottish countryside.

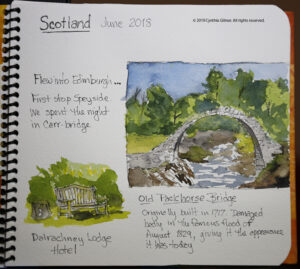
My next page includes a painting of the Old Packhorse Bridge and a bench outside our first hotel. I chose the bridge for this first page because I’ve painted it before and felt comfortable with it. Some of the students in the class said that painting the first page was intimidating because they feared they would mess up their book. Choosing something I was comfortable with was a good idea.

The next spread includes a painting of the first of many distilleries we visited. I included my sister standing in front — people are always hard. It’s something I need to practice more. The right hand page was a landscape, but I didn’t like it. I found it bland so Robin suggested that I could glue something on top of it to give it interest. I sketched a small botanical and did that.

The text was a challenge since I wasn’t prepared to recall details of my trip from eight months ago. Some of my pages have little to say. It would be easier to have more robust commentary if you did the book as you traveled or shortly afterward. It would also be helpful to keep a running journal.

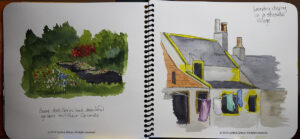
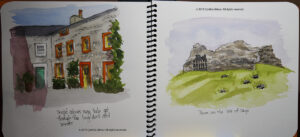
The next spread included a lily pond from a garden we toured and a painting of laundry drying in a seaside village we visited. This was inspired by Robin’s laundry sketch. Laundry hanging to dry is always so colorful.

At this point I was realizing that my layouts were kind of boring. Robin suggested that I not include sky or frame these two in boxes, but let them fade out at their edges, which I did. I decided that the next two pages needed to be more interesting. As a result, they have more going on, but I’m clearly missing Robin’s designer’s eye. As I said, this is something I really need to work on.

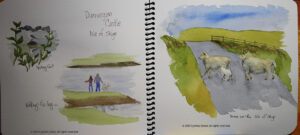
I was starting to run out of steam and interesting subjects on the next two spreads. The sheep crossing the road was one of the ones I did once I got back home.

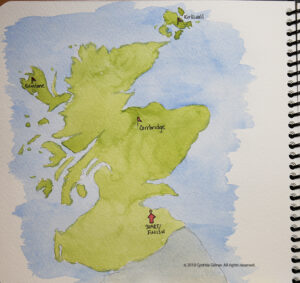
And finally, I tired my hand at a map.

While I have to say, none of this is my best work, I think I learned a lot that I can use to capture things plein air or in the room after a day of traveling. Sketching while traveling provides a new way to savor your vacation because you focus on capturing what you saw in a painting requires so much more reflection than just taking a photograph. I’m looking forward to doing more of this.

Sorry this is such a long post. If you’ve taken the time to read to the end, thank you!

Class: Capturing the Subtle Beauty of Winter in Watercolor

Now that I’ve joined the Shenandoah Valley Art Center I’ve started watching their class schedule and saw an upcoming one by Peg Sheridan. Her classes fill up quickly so I jumped on it. Peg lives in Staunton and teaches all around the area. She’s been a watercolorist for forty years! Her teaching style and demonstration skills were great. That said, she made it look so easy it was frustrating.

I showed up prepared to be taken out of my comfort zone. I think to some extent that happened.

Peg’s initial demonstration was very loose. She reiterated something I’ve been told by multiple other teachers, that you can start light and loose and then slowly construct your painting in layers on top of that.

Through out the class Peg was a treasure trove of tips and tricks. I took as many notes as I could. For those who do not paint (or aspire to), this might be more detail than you want. Some of the more valuable ones were:

  • When you start a painting, think about the outcome you’re trying to achieve. What kind of feelings are you trying to evoke?
  • She had a lot of advice on mixing paint that go beyond simply mixing paint on your palette. First, she demonstrated mixing paint on the paper using gravity – put on your washes and then tilt the paper and let things run together. Second, she said it you do mix on the palette, don’t mix completely – just swirl the colors together but make sure you pick up some of each as well as the mix when you put brush to paper. This cuts down on muddy, over mixed colors.
  • Use the side of your brush more – don’t always hold it like a pencil. Again, this is something I do with oils, but less so with watercolor. I need to fix that.
  • Stand more while you’re painting to stay loser. You use your arm more instead of your fingers. I usually stand when working in oil, but sit while working in watercolor. I am going to start to stand more, at least at the beginning of the painting when I want to be looser.
  • If you wet the paper wait till it starts to lose its shine before painting (I knew this but it’s always a test of my patience). Then as it dries, use thicker paint. Stop before it gets too dry because you’ll start getting back-runs.
  • If you over-paint to make your whites pop, use acrylic instead of gouache to get brighter whites.
  • For blotting clouds in the sky, wet the paper towel or tissue. It will pick up more paint.
  • Also for skies, leave the whites of clouds dry but wet the shadows and tap in color.

There were some others, but these were some that resonated with me.

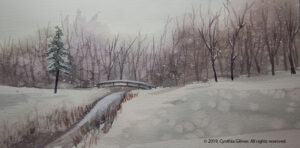
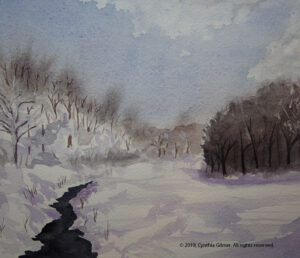
I did two studies in the class (shown below). Both are small. Peg’s advice was to strive to do several smaller paintings in the class rather than one big one to learn more. The first was a view of a bridge on the golf course near our house. I took the reference photo during the big snowstorm we got in December. The second was of a stream on the same golf course. This reference photo was taken several years ago on a sunny day after a big storm. Peg said she liked the first one but not the second. She thought the stream was too dark, and suggested I balance it with darker trees on the right, which I did. It still wasn’t her favorite, but I liked it well enough as a study piece.

Adventures in Watercolor

We spent about a week and a half at our mountain home for the holidays, and I took several days off from my pesky day job to do some painting.  As I’ve said, I’ve been trying to improve my watercolor skills.  One of the ways I’ve been doing that is by watching YouTube videos.  While I have learned a lot, and I’ve gotten some great ideas, the most important thing I’ve learned is that it takes a lot of practice!  You’ve got to try it for yourself and figure out how it works, and what works for you and your style.  So I decided to do as much painting as I could and I’m sharing the adventure.  Sorry this is a long post. I could have broken it into several small posts, but I think there’s value in covering all of these together.  (Note: clicking on any image to see a larger version.)

Snowy 7th Fairway Stream

In my most recent post, just after Christmas, I shared a painting I did of a snow scene of a pond on the golf course near our home.  To do this I watched a few videos on painting snow in watercolor, including this one by Grant Fuller.  I think the videos were all helpful.  I like the foreground including the grasses peaking up through the snow. I used masking fluid to block some of the white branches in the foreground trees and one of the strongest ridges in the field.  I augmented the whites with a white gel ink pen.  I don’t really like the clouds.  Skies look easy when I watch others do them, but I still struggle with them.  

snowy-7th-fairway-stream-2

3 Ridges in Cloud (Watercolor version)

Next I decided to do a scene that I’ve done multiple times in oil, hoping that familiarity would help.  I’m not sure it did. Sometimes I think that watercolor is better if you’re not too tied to the original scene.  Photos should really just be an inspiration.  Many of the videos I’ve watched, including several by Steven Cronin like this one are done entirely from the artist’s imagination. I’m definitely not there yet!

In this painting, I like the sky, but not the way the clouds are laying in the valley.  I think the foreground trees turned out okay. I augmented them with my white gel ink pen.  For what it’s worth, this painting looks better in the original form.  The scan didn’t do it justice.  

three-ridges-in-cloud-wc

Stormy 17 Mile Drive

Then I decided to do a seascape, which was an ambitious undertaking. I have done very few of these, even in oil.  When I was showing my work at the Farmers’ Market in December, one of the other artists, Rajendra KC was quite taken with the oil version of this scene (in my gallery if you are interested).  Given that he is a very talented local artist, I was quite flattered by this.  I decided to try to do a watercolor version.  

I have to say, I surprised myself with this one. I had very low expectations but it came out very nice.  This is perhaps my best sky so far.  I did not mask the white caps. I used discipline (a challenge for me) to leave them white. (I did watch part of a video that showed this, but I didn’t capture the link.) I augmented the white caps with white gouache in places, which is how I got the look of spray. I also really enjoyed doing the rocks. I took my time, starting with washes for the lighter ones on the left and then slowly layering on shadows.   

stormy-17-mile-drive

Clump of Trees (Study)

Then I discovered Steve Mitchell’s YouTube channel. I was quite taken with his landscapes and found his approach to be more valuable, from an instruction perspective, than many of the others. I watched several of his videos, but I thought this one on “accidental painting” would be fun to try. My version did not turn out nearly as nice as his, but it was a good learning experience. It also forced me to paint from my head, although I will confess that I allowed myself to be pulled in the direction of Steve’s example.  There are a lot of things I don’t like about this painting, but given that it was a quick study it’s also not bad.

clump-of-trees-study

Springtime Field

Inspired by my clump of trees study I decided to take on a painting from a photo I took of a field near Lovingston Virginia last spring.  I had a lot of fun with this one, and most of it I like.  There are some things I might do differently if I did it again. Rather than pointing those out I think I’ll leave it as an exercise for the reader.  

springtime-field

7th Fairway Pond

Finally, on the morning of the day we were to leave to come back to Northern Virginia I decided to do one last painting. I had limited time so I did this fairly quickly, but I think it turned out okay.  I like the sky and the shoreline of the pond – especially the rock!  I’m not crazy about the mid-ground trees or the reflections of the trees in the water, which I did quickly because I was running out of time.  

7th-fairway-pond

All in all, I think I made progress.  I’ve continued to watch videos and I have several more techniques I’m excited to try as soon as I’ve completed this post. Practice makes perfect – of course there is no perfect in art, but practice is a way to aspire to perfection.